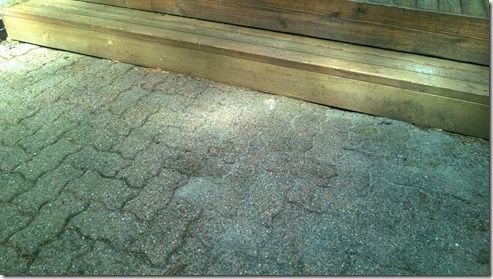
Honey Do Brick Patio Leveling
This post is part of the [“Honey Do List”](/posts/new-house-new-honey-do-list/) series. We bought a house on 3/1/2014, and I started a list of things that I’d like to be completed; both fix-it type and desired projects. You can see the full list, and links to previous posts there.
Project Completed 2014/04/06
Needed items:
- something to help pry the bricks up: small prybar, trowel, bloodied fingernails..
- Sand… I only needed one 60lb back of utility sand $5 and only used about 1/3 of that. The rest I planned to use in another project.
- Mallet to help settle the bricks, rubber mallet works great, and you will likely use this on other projects where you need to hit without breaking something. Like your thumb.
- Water hose to wet the sand down to help it settle.
- Level… or straight piece of 2x4 to gage how far up the sand needs to come
- Broom or dust brush
- Optional: Trowel helps to get the sand into place, but your hands can work here too.
- Not Optional: BBQ
We had some friends over for a BBQ on the brick patio we have out back.. and I stepped off the wood deck and into a depression in the bricks, twisting my ankle in the process. This led me to add an item to the “Honey Do List” : Fix ‘Pot hole’ in brick patio before someone breaks a leg.
There are several places in the patio where there are small bump ups due to roots, or slight depressions due to settling, but this one was right off the step from the deck, and liable to be missed causing someone to fall (twice by me) or get hurt. I have never repaired or even installed a patio, but what the heck… let’s jump in.
What is typically under the brick in your patio? Sand. sometimes there will also be a level of pea gravel, or even metal screed, but likely only sand. That is the case in my patio.
To start, you need to pull up a brick that is in this area, the first one will be the toughest since it is interlocked with its neighbors and wedged in like a vise due to the settling. using a small pry bar or two can help here, take your time not to break anything. Inch it slowly up on both sides till it can be grasped and pulled up and out.
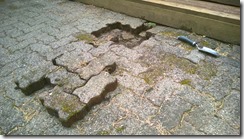
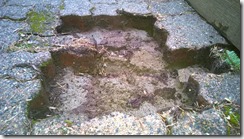
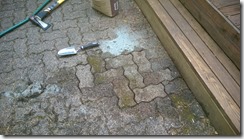
I unfortunately did not get a picture of the original depression, but have some shots of the spot after I’d pulled out a section of the bricks. Be sure to put the removed bricks onto another area in the same configuration that you pulled them out. This makes putting them back in that much easier, especially if they vary in size due to being on an edge of the site. Pull out as many bricks as needed till there are no bricks ‘dropping’ into holes in the sand. You can leave some on the edge if they only have cavities that are accessible to be filled.
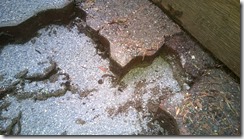
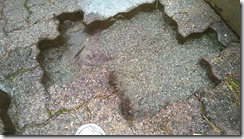
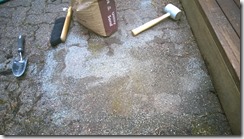
From these pictures you can see the holes left under the bricks where the sand has dropped, allowing the bricks to settle down, and causing the ankle snapping death trap waiting for my next litigious BBQ visitor. if you look at the half brick that is right next to the deck step, you will see that even that has dropped 1/2”. The bricks in the center portion were nearly 1” lower than the surrounding area, causing a well placed sneaker to roll-over and occupant to squeal like a little girl.
Start adding sand to the area (second pick above shows sand being added), paying attention to add sand UNDER bricks on the edge that need to come up. I added quite a bit of sand to the 1/2 brick near the deck, as well as to two others that showed cavities. Jam sand into these cavities till they seem to have the support of the sand, and no air pockets. I lifted the 1/2 brick to add enough sand here to support it to a level position with its neighbors. Add sand to the center area till the sand is relatively level to the bottom of the bricks in the patio. Smooth and level the sand and pat the sand down (with trowel or your hands). Wet the entire area to ensure that the sand settles and no air pockets exist.
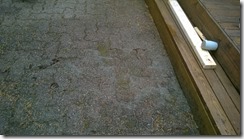
Using your level 2x4 start placing bricks back, but slowly… you need to make sure that they develop into a flat surface when they all are back. This may require the surface to not actually be level with the earth, since this area of the patio may not actually be level itself. The goal is to remove the depression, flattening the section to be uniform.
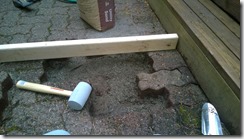 use the level in three different configurations across --- updown | and diagonal / \ to ensure it is uniform in all directions. You will need to tap the bricks down to bring them level if they are a bit high, or add/remove some sand to adjust to bigger discrepancies. Just be sure that the brick is supported uniformly on all areas of its base. Take note not to leave big dunes of sand near the edges that cause the brick to ‘sit’ on these edges. The sand will eventually settle again, and you will be doing this all over after the next BBQ/lawsuit.
Once all the bricks are back in position, and you have tapped them all down with the mallet to ensure they will not settle, you need to fill the gaps between each brick with sand. This is easily achieved by pouring a bit of sand on the area, then brushing the sand into these gaps with a broom/brush.
This sand is important so that the bricks don’t wiggle about and walk there way out of level. take your time and keep adding and brushing sand around the area till no more will fall into the cracks.
After this is done, wet the area again and leave it till it dries.
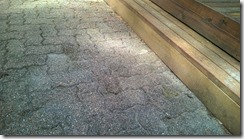
Test the area to see if there is any settling, and brush off the remainder of the sand. Enjoy!
