Honey Do: Punch the Fatty. (Hang 'em High)
This post is part of the Honey Do List series. We bought a house on 3/1/2014, and I started a list of things that I’d like to be completed; both fix-it type and desired projects. You can see the full list, and links to previous posts there.
If you ever want more detailed pictures of the finished project, or explanation on how something was completed, feel free to ask in the comments.
Project Completed 2014/04/07
 In our apartment living life, we always seemed to have a ‘gym’ on the community property that we could make use of for working out. Since moving to a house, we have lost that luxury, and are replacing it with our own version.
I’ve assembled the treadmill that my wife likes to use for her workouts, but this is not conducive to my worn out knees. Teenage me took too much pleasure in the mogul fields of Vermont to have any cartilage left for high impact sports like jogging in place. Thus, my workouts consist more of mountain biking, hiking, climbing, and martial arts.
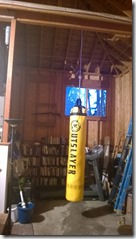
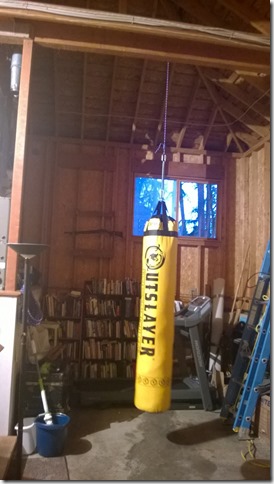
I loved Jiu-Jitsu for many reasons, and wanted to continue to release stress and gain cardio and strength in some way using this activity. Thus the idea to put in a full length heavy bag was the solution I took. I chose an unfilled Muay-Thai bag from OutSlayer since it had the best reviews, and was 6’ long and 150lb weight.
Filling the bag
The fact that it arrives unfilled requires you to fill it (duh). After a bit of research, I chose to gather as much cheap second hand clothes from the local thrift store (It took three full rucksacks worth at $40!) and the left over sand from the patio leveling project. The sand was poured into plastic grocery bags, and then wrapped with duct-tape.
Stuffing the punching bag with the clothes, and spacing
the sandbags (always in center of bag) along the height of the bag took quite a long time. It needed to be packed in TIGHT. The final weight of the bag is now 110lbs. I could add more sand to bring this up, but I don’t find that it swings very much, so for now this will do fine.
Hanging the bag
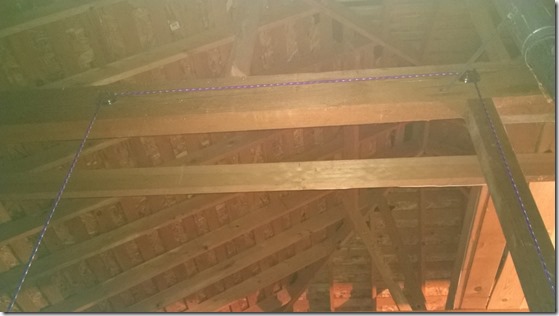
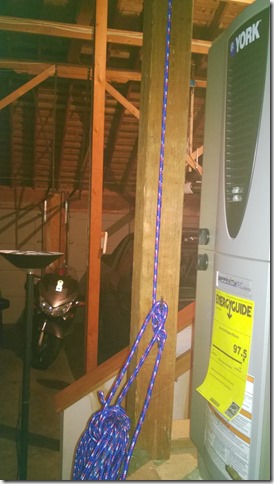
I wanted a solution that allows me to raise and lower the bag, and remove it when the area is to be used as a workshop (once that project is completed). To do this I chose to hang the bag from the main support beam that crosses just at the back of the garage, next to the stair. I also chose to hide the hanging system and mounted all components on the backside of the garage so that the view from the front as you enter is not showing these items.
Hardware: I picked two pulleys from the local hardware store to run a length of nylon braided 3/8” cord through, the cord has a strength of 250lbs, and each pulley has a max load of 544lbs. I chose pulleys that are not hanging, but mounted with side housing to be screwed in to the face of the beam. Taking care to mount the pulleys so that the cord will run freely and not touch the housing in anyway, I routed the cord through from the bag up and over, then down to a cleat near the stair for easy access to lower the bag.
I also hung the bag from the rope using two screw gate carabineers (hardware version not climbing) and also a heavy duty spring with loops on each end. This spring takes a lot of the force of the workout off the rope and pulley system, and limits the impact to the beam. It also reduces the bounce and swing during workouts, I highly recommend this as part of a heavy bag system.
I only think one addition may be needed, and that is something to allow the bag to spin, without the cord from twisting. I’m going to go to the hardware store and find this component, and install it at the top of the spring to free the cord from the bags effect.
The solution works great. There is plenty of room to do full roundhouse kicks to the ‘head’ of the bag. The bag doesn’t move very much during normal strikes, and is great to get the heart rate up.
UPDATE 2024
I actually did find a spinner for this to allow the back to spin freely. This is a necessity. Additionally, I would recommend using a force multiplying pully on the bag as well. You simply need to tie off one end of the rope just near the pully on the beam, then run it down through a pully (or even just a ring) on the bag, and back up to the original pully on the beam. This effect makes it SO easy to raise the bag, giving you a 2:1 advantage.


